Home Bar Construction Overview:
 Other than coming up with a solid, workable design , it’s not difficult to build a home bar. We can help save time and scrap by providing a working set of plans to get you started in the right direction. There is no better feeling than relaxing in the comfort of a home bar that you built with your own hands. Here’s a breakdown of the home bar construction process:
Safety First:
Before you pick up any tool, pick up a good pair of safety eyeglasses. A split second of not wearing safety equipment could mean an avoidable lifetime handicap. Wear leather gloves when handling wood and approved safety eye wear at all times. Before proceeding browse eye protection options.
Check your available tools:
Our plans require only basic, common woodworking tools. These include hammer, corded or cordless drill, Phillips screwdriver bits, a power circular saw, a power miter saw for making angled cuts, a power jig saw and small table saw.
Optionally you can use a pocket hole jig for assembling trim boards. No need for fancy dado’s, mortise or tenon joints.
If your really don’t feel comfortable using power tools, ask a handy friend who will be happy to assist for a few free beers at your completed home bar.
Always remember to ask if you’re not sure about some procedure. We offer plenty of help resources to our members.
Find a working plan:
With so many choices, it’s not as easy as it sounds. A decent plan is the best tool you can have in your toolbox. It will simplify the entire construction process from buying materials, cutting, assembly and final trim.
Our site offers over a dozen home bar construction projects for a very reasonable bundled price that includes our ALL bar plans collection. We suggest checking out the bar photo and bar video section of the site for examples and ideas from many happy builder’s.
The membership site has thousands of detailed photos of completed bars as well as the full assembly process.
Prepare Your Location:
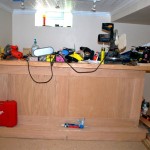
In some cases, you will need to prepare the work area, especially when building a basement bar. This might mean adding or removing flooring, waterproofing, mold proofing or even pest removal. Plumbing and electrical may need to be added or extended. These items, as needed, will need to be added to the overall shopping list.
If adding as a temporary fixture, very little prep is required, as the bar can be positioned as needed by two people. Permanent wet bar installations will require more prep for utilities as mentioned above.
All you need is a clean, dry area to start. If you have standing water or mold issues, then a basement repair contractor is recommended.

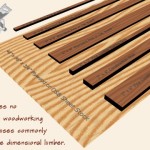
Projects use standard dimensional lumber
Purchase Your Materials:
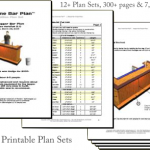
Once you open and review the plan of your choice, you can print them on your local printer. Your printable plans document will provide you with a list of common building materials that you will need to construct the bar framework and core structure.
Beyond this material list, you can add whatever you like to your bar to make it unique or to create a specialized theme like a tiki bar or sports team theme bar. Includes standard bar top construction and parts sources.
Start Building Your Home Bar!
Once you have your materials on site, you can begin the assembly process. Follow our step by step instructions starting with the floor and building up to the bar top. It all assembles easily the first time, every time. Time tested and beer drinker approved designs. Start Building Today!
Don’t Forget Bar Stools
[amazon_link asins=’B01JYUSLPM,B000NPQFVK,B00LNMYVBS,B00GV28VBQ,B01N2H1HXH,B078H84JLH,B00LNMYT6U,B078Y4NCYQ’ template=’ProductCarousel’ store=’easyhomebarplans-20′ marketplace=’US’ link_id=’e0c89c0d-8cdb-11e8-976e-71e4ba4db4eb’]


